Skip navigation

Promoting my town

My video about my city

At the end of this mission you should be able to:

  • produce a video about your town/city.
  • reflect on the good sides of the city/town.

We will work on speaking and writing skills.

This mission will take us four lessons, so you can work calmly but please do not stop focusing on your final aim: creating a video clip about your city/town.
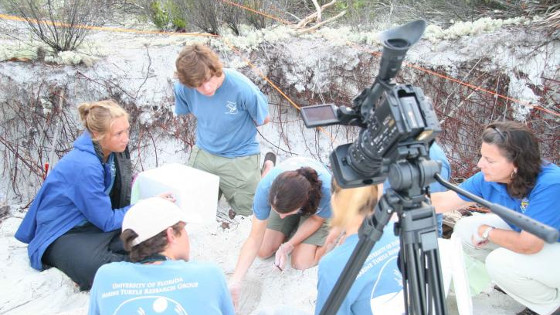
A group of people recording and doing a science research
Video recording of scientific research (Dominio público)

You will work in teams of four. To make it easier you have to follow the steps below:

  • Let’s take all the relevant aspects of your writings and decide what 10 you are going to record about.
  • Write a storyboard for you video. You may use an online tool such as StoryboardThat to design it. The storyboard should have:
    • Beginning: How to start, title, images, etc.
    • Development: What is going on in the video? How are you going to show these ten aspects? What are you going to say?
    • End: Search for a slogan to promote your city.
  • Your teacher will check if the storyboard is correct.
  • Start recording the video. Each student will be responsible for their own role: cameraman, speaker, actors, film editor.

You can use the online tool WeVideo to create, edit and publish your final outcome. 

When you finish with it, you can upload it to Youtube. If choose this option, your teacher will create a channel for your project and every clip will be gathered and shown there. Each team should write a little introduction of the video to publish it on the channel.

The 'Rubric to assess a video assignment' will help you know how to do a great job. 

When you finish and upload your video, it is time to create a post in your blog. Describe the work you have done and embed the video. The link to the classroom's channel must be part of the post too. Don't forget the tag "Project my town".

If you want, your teacher can disseminate your post using the classroom Twitter account. To do so, you have to write down the tweet for the him/her. Remember: 

  • You can use up to 280 characters.
  • Include the link to your post. 
  • Use the hashtag of the project: #EDIAmytown

The 'Rubric to assess a tweet' will help you  know how to do a great job.

Organising and sharing

Now it's time to share and spread your fantastic word. As a first step, create a complete post (digital portfolio) with a reflection about what you have learned during this project. The following items will guide you to create this post (Don't forget the tag "Project my town"):

  • Main vocabulary of the project.
  • Grammar reference.
  • All the activities related with this topic.
  • Final outcome of the project: The video promoting your town.
  • A good idea would be to include the links of all the post you have created along the whole project.

In addition, you are invited to make a public presentation of your videos. Don't you think it could be a great activity to organize and event at your school/classroom? Teachers, students, parents and maybe other people could know what you have done and all your effort. 

This document 'Rubric to assess an oral presentation' will help you know how to do a great job: 

Now it is time to spread your final post through the social networks. Remember we have a Twitter account for the class, it is run by the teacher. So it is time for you to create a tweet to spread your post. It will be published through the class account. Remember:

  • You can use 280 characters.
  • Include the link to your post. 
  • Use the hashtag of the project: #EDIAmytown.

The 'Rubric to assess a tweet'  will help you  know how to do a great job. 

Learning diary: Final evaluation

You have finished the project, but there is a very important aspect to focus on now. You will assess all the activities and missions you have done. It is very easy, you are going to think on all the things you have learned and how you have learned them. To do so, you must think on all the missions you have worked on.

Assessment is very important, because it will help you and the teacher solve and change all the aspects that might not work properly and continue using all the ones which have helped you learn more and better. But it is especially meaningful for you to identify how you learn better.

To carry out this assessment, you have to complete this assessment chart: 

You can do this work individually and then share it with your mates (those you have been directly working with). Finally, you will have to share it with the whole group.

What's more, if the final assessment is positive, your teacher will give you a badge recognizing this effort that you can include in your Learning Diary. By doing so, you will be awarded an accomplishment badge by your teacher who will be able to create them using this website.

You are invited to talk to your parents about all this. You can publish a summary of your learning process in the final post with all your outcomes.

Creado con eXeLearning (Ventana nueva)